Direct Debit is the most popular payment method for nonprofit organisations and looking at its convenience and cost-effectiveness, it’s easy to understand why. With proper optimisation, you can use it to increase regular gifting and control the entire process from one system.
And while there are many ways to just capture direct debit donations, reconciling and bringing all the data together can quickly become overwhelming for organisations of all sizes. Going from a handful of direct debits to disconnected data is a scenario we often see, where organisations waste precious time trying to bring all their data together in order to improve operational efficiencies.
Effective payment processing is critical for nonprofit organisations, as it can boost donor engagement and help sustain regular giving. That’s why integrating payment functionality into a customer relationship management (CRM) system like Salesforce can be a game-changer. Not only does it streamline the payment process, it also provides a centralised location for donor data, making it easier to reconcile and analyse.
But what if you could accept, process, and reconcile direct debits directly in Salesforce?
In this blog, we’ll discuss how you can choose from out-of-the-box integrations or design custom processes to align with your unique business needs in order to increase operational efficiencies and provide better customer service, all within one platform that grows with you. Keep reading to find out more.
Step 1 – Accepting a Direct Debit donation
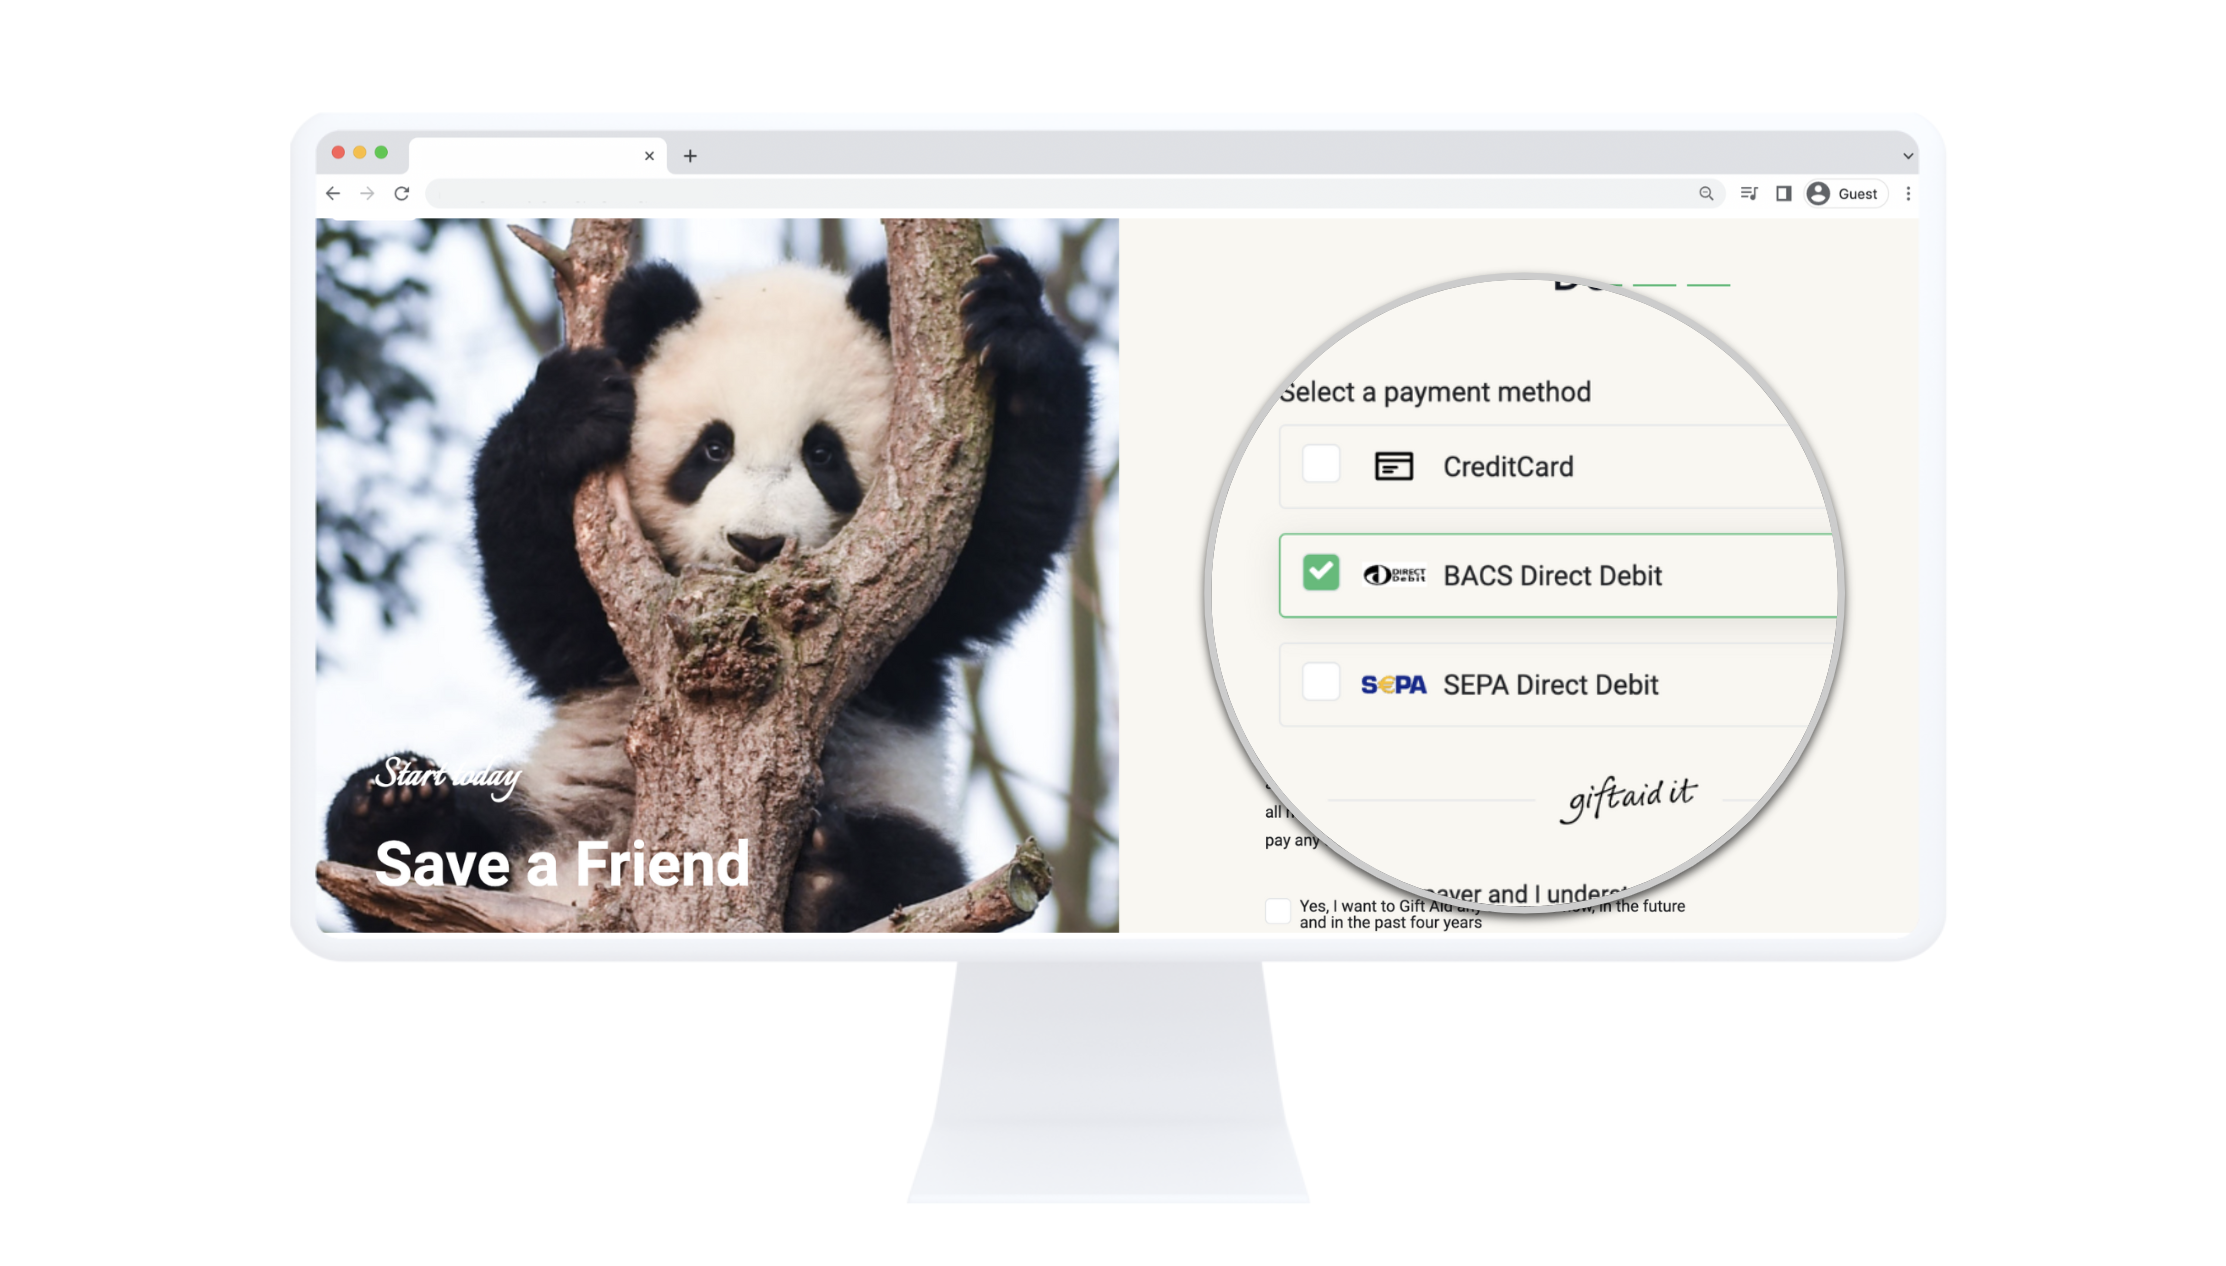
The first step in the Direct Debit process is accepting the donation. You can use FinDock’s Giving Pages, API, create them manually in Salesforce, or import them from external sources. In this blog, we’re using Giving Pages as an example – these were built primarily for fundraising and enable you to customise the donation amount and frequency, as well as the payment methods and processors.
Depending on your region, you can accept Direct Debits through SEPA, BACS, CH-DD, Avtalegiro, or LSV+ using FinDock. And if you’re in the UK, you can pair it with GiftAid in order to increase your income.
After connecting your payment methods and processors, your donors can make a Direct Debit donation through your Giving Page. In this same step, you can also collect the Gift Aid declarations.

After submitting the form, FinDock automatically creates a new Direct Debit in Salesforce, and the task is finished for your donor. Easy enough.
For BACS Direct Debits, there’s an extra step after accepting a Direct Debit, which requires you to send the registration file generated by FinDock to your Payment Service Provider or BACS bureau. After that, you will be able to move through the process and prepare and collect the Direct Debit donations.
Step 2 – Processing the Direct Debit donation
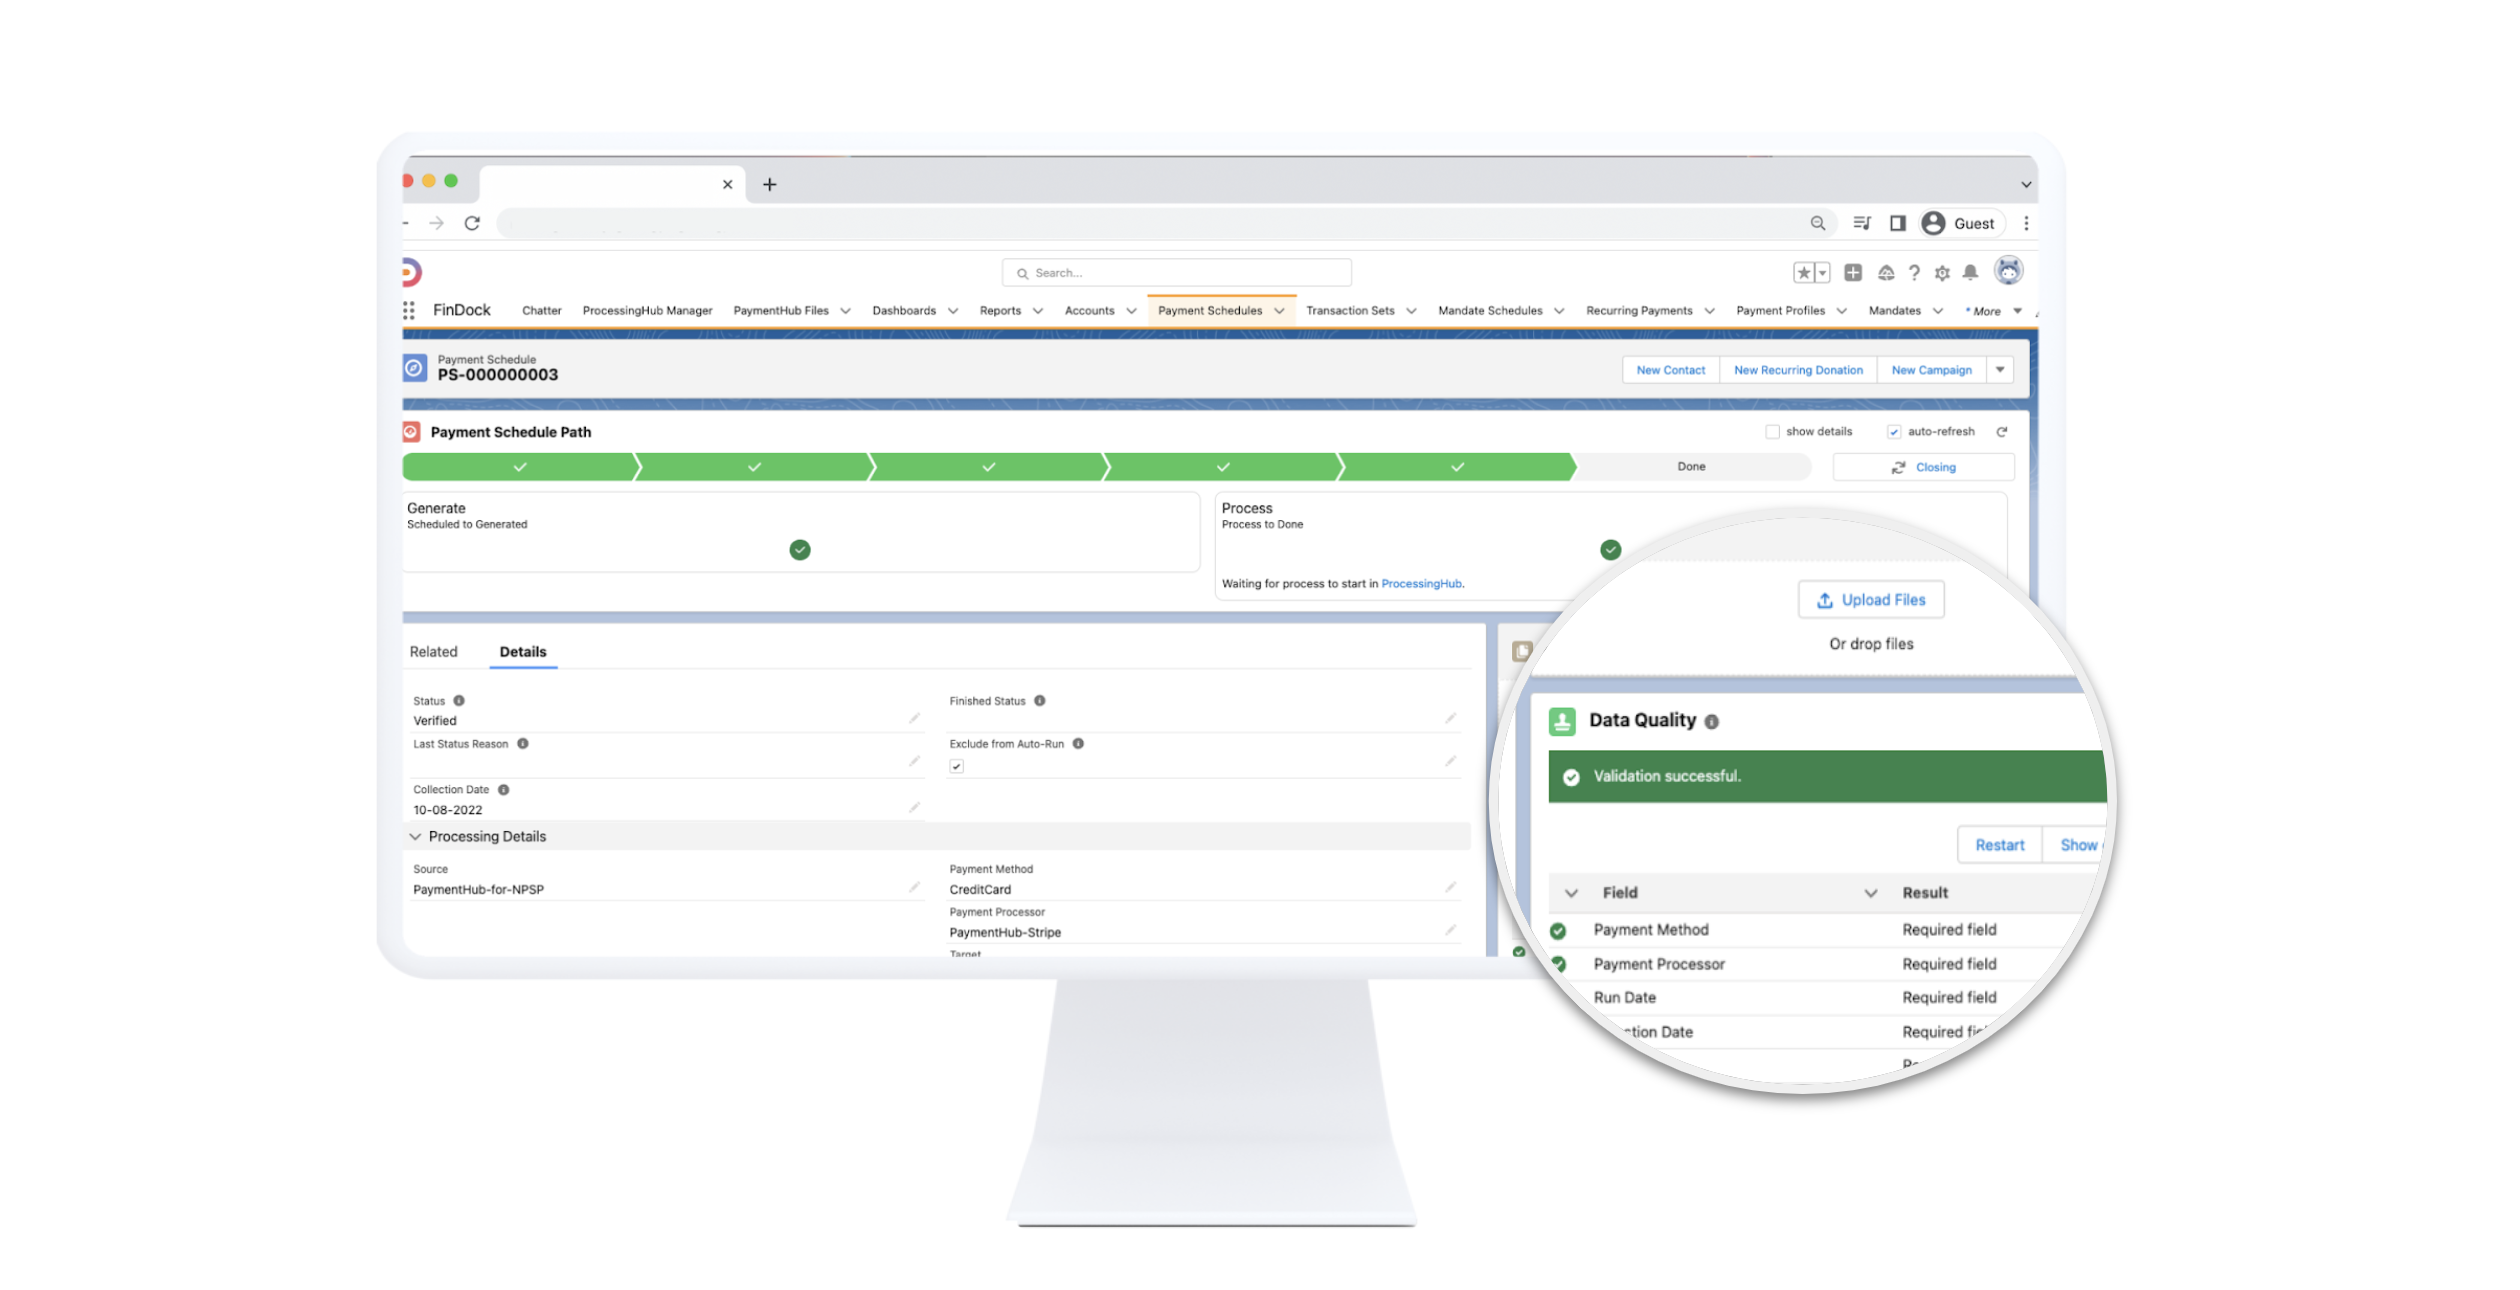
Processing the Direct Debits in Salesforce requires minimal user action – most times, it’s just a matter of compiling everything into one file using FinDock’s engine, sending it to the bank, and then uploading the bank report to Salesforce for reconciliation. But let’s take them one by one.
When to do the direct debit runs is something that concerns nonprofit organisations. For example, if the day is on the weekend, the process must be delayed. Normally, making sure the files are ready on time every time can consume quite a lot of time. What you can do with FinDock, however, is set the system to start processing one day before or after holidays and weekends. For you, this is a single action while the system does its job in the background.
And to ensure all the data is accurate, you can use the Data Validation tool that checks every single line before compiling it into a big file, ready for submission. This removes the need for manual processing and reduces the risk of human error while also saving you time.

After all the data is checked, FinDock generates the Direct Debit file, which you can then send to your bank, PSP, or BACS bureau.
Step 3 – Reconciling Direct Debit donations
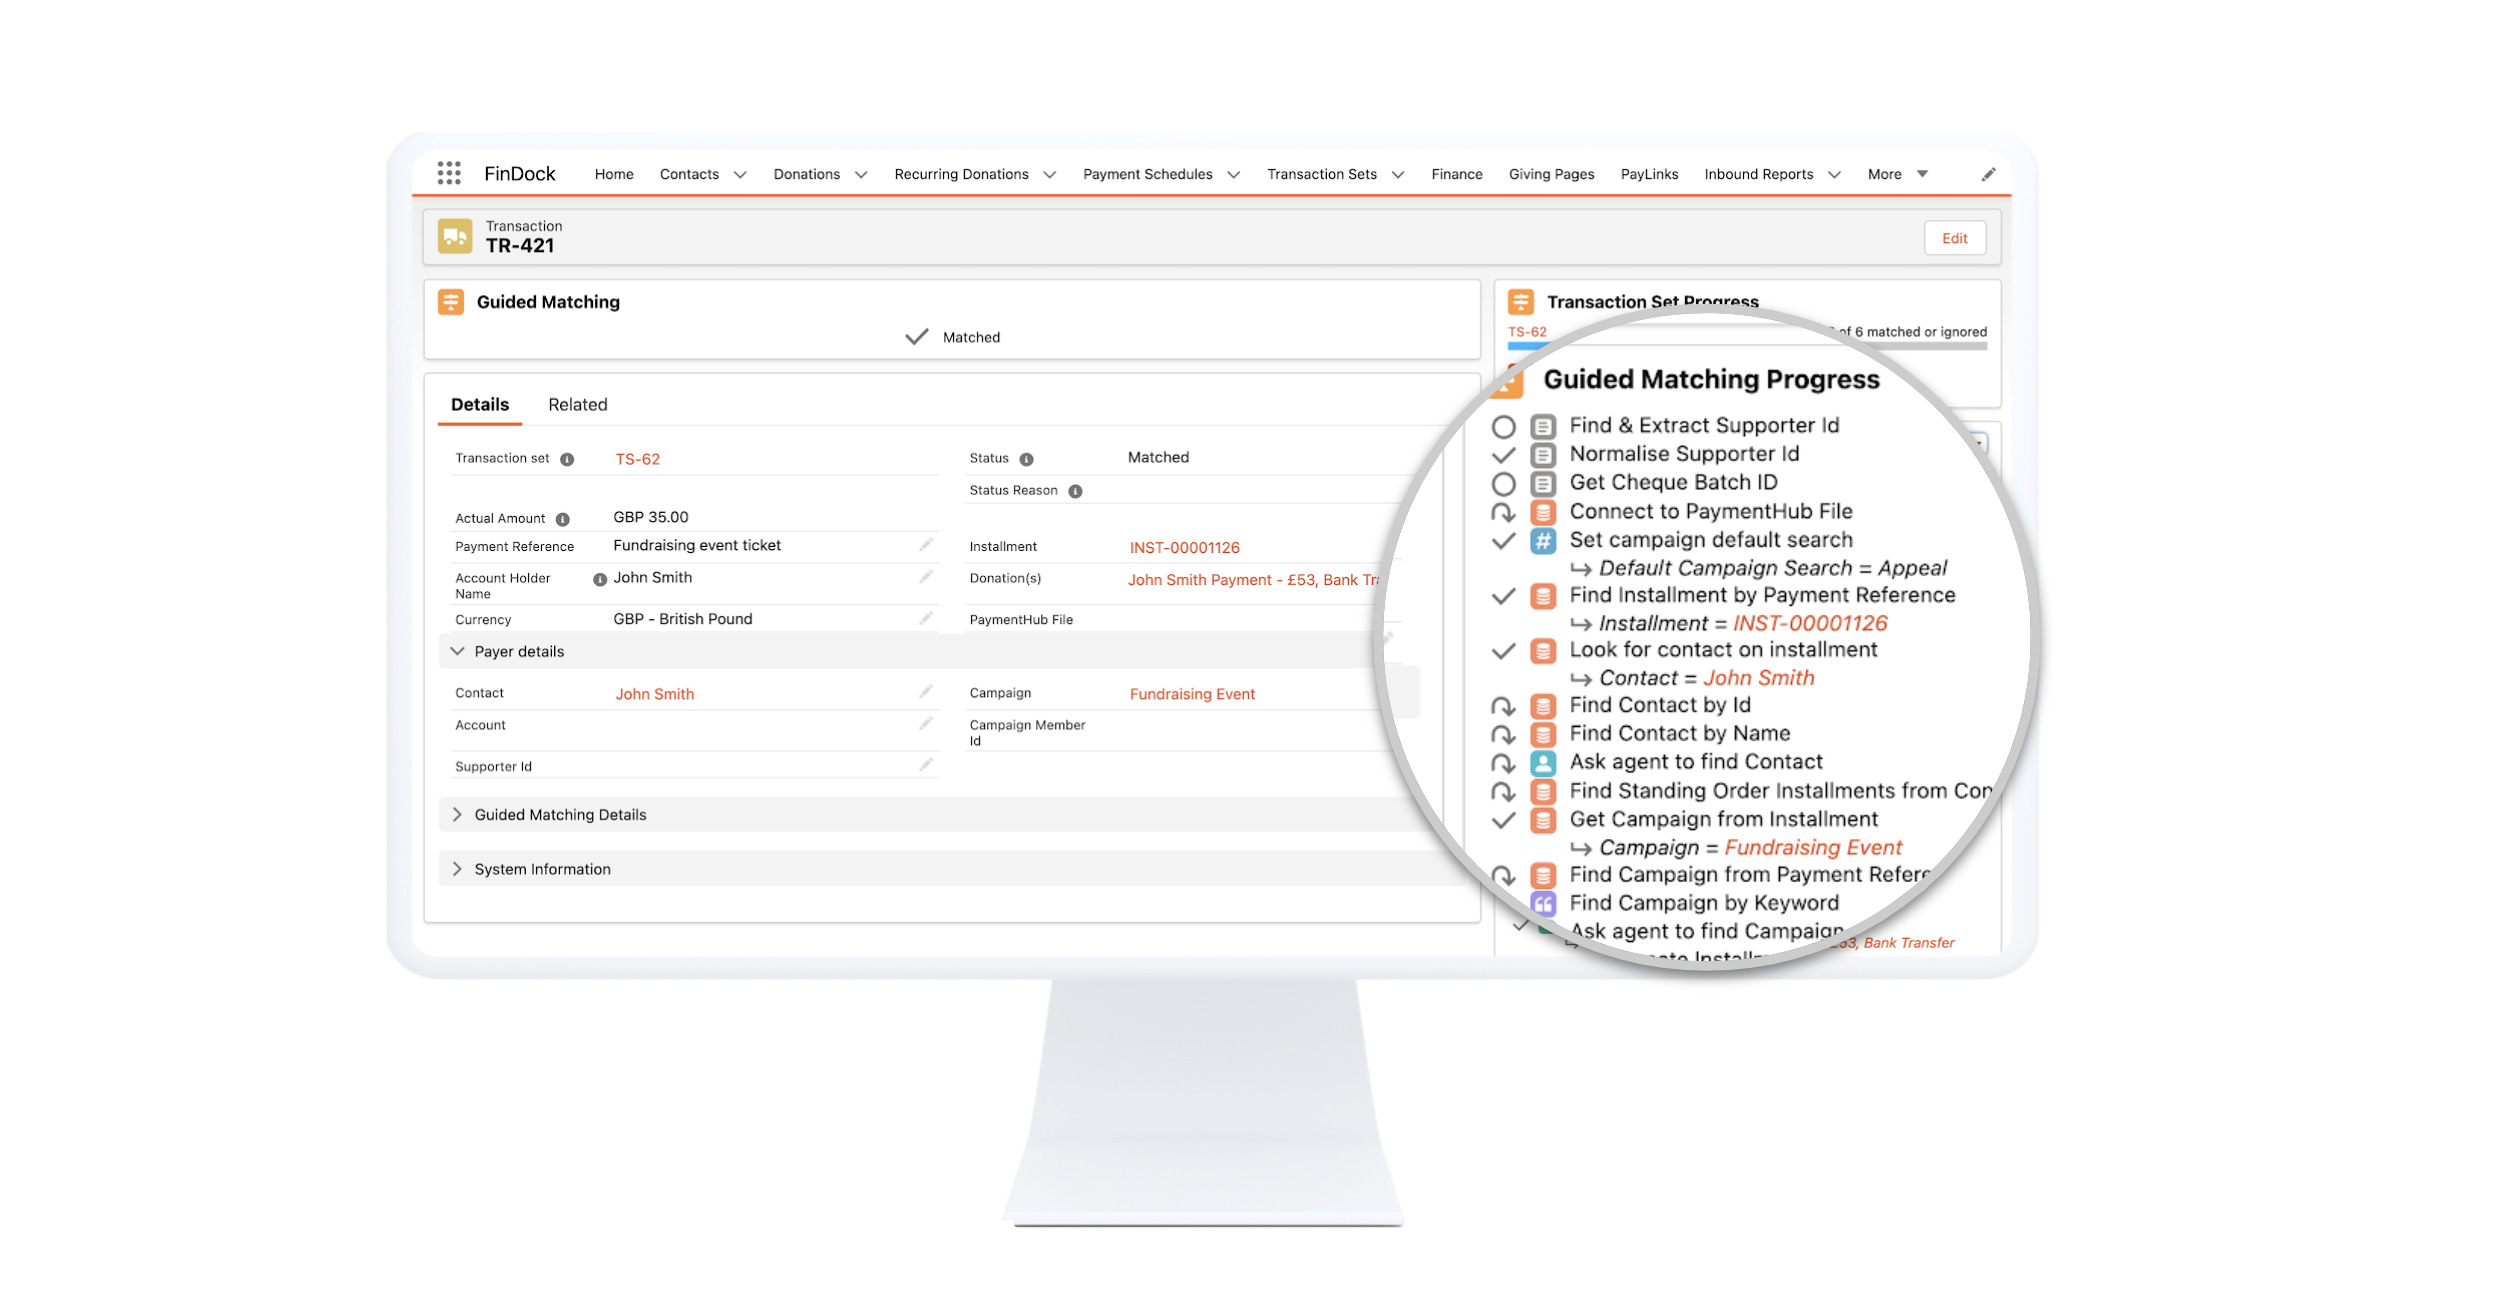
Not all your transactions will be successful, and that’s ok. But when that happens, FinDock can process the report provided by the bank and mark failed transactions as reversed. FinDock supports a large number of bank formats, so for a complete list, visit our documentation.
When a transaction is failed, FinDock can initiate a follow-up flow – emailing the donor to inform them about the failure and inviting them to pay using a different payment method. Every failed transaction gets a custom PayLink, which can easily be included in email templates. After the payment is complete, FinDock can match it to the initial transaction, offering a clear timeline.

Since all the data is native to Salesforce, you can view your progress in real time through Reports and Dashboards, which enables you to adjust your campaigns as you go, modify the donation amounts, and make data-driven decisions for future campaigns and programs.
Integrating payment functionality into your CRM can boost user satisfaction, data quality, and donor insight by up to 169%. By providing a seamless payment experience, you can gain valuable insights into customer behaviour, identify revenue trends, and tailor your marketing efforts accordingly. It’s a game-changer for your organisation.
FinDock’s Direct Debit management capabilities enable non-profit organisations to optimise their payment process, increase regular gifting, and control expenses. With the ability to capture, process, and reconcile direct debits directly within Salesforce, organisations can eliminate disconnected data and increase operational efficiencies.
Want to know more? Then get in touch!

