
FinDock Demo App
Creating a demo with end-to-end payment processes included can seem challenging. To facilitate Solution/Sales Engineers and Consultants tasked with providing a Fundraising or Education focussed demo, FinDock provides the FinDock Demo App. With this app we take care of all the hard stuff, allowing you to focus on the story rather than the implementation.

Getting started
This article guides you through installation and configuration of the demo app. You can choose if you prefer installing and configuring the FinDock Demo App with the written step-by-step instructions in this article or by watching the installation video. If you have any questions, just reach out to us.
Please be aware that the demo app is for demonstration purposes only, and not intended to be used in production orgs. It provides quick setup and configuration options specifically designed around the available demo-flows. After installation, the demo app allows you to be ready for an end-to-end demo in 5 minutes.
Read the step-by-step instructions:
Watch the installation video:
Installation
How to install the FinDock Demo App into your org. This can be accomplished in two ways, either through the Q-Brix system in IDO’s or manually.
Salesforce Solution Engineers in an IDO:
FinDock has a Q-Brix called “FinDock Demo Brix” Simply find it, and click install. This will start the installation process. Wait for all installations to be complete before continuing with the setup.
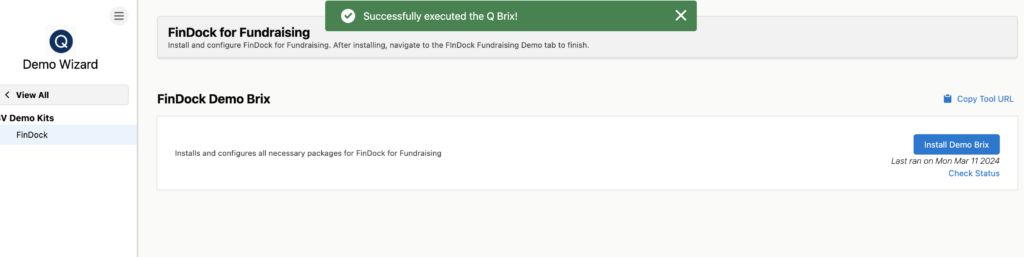
The FinDock Demo app Q-Brix in an IDO org Demo Wizard
Salesforce Partners:
Make sure Person accounts and Fundraising are enabled on your Salesforce Demo Org. (if you are using an IDO-NPC org this is enabled by default) Start by installing the needed FinDock packages via: https://installer.findock.com Select the following packages:
- PaymentHub Core
- FinDock Additional Setup
- ProcessingHub
- Stripe for PaymentHub
- FinDock for Fundraising
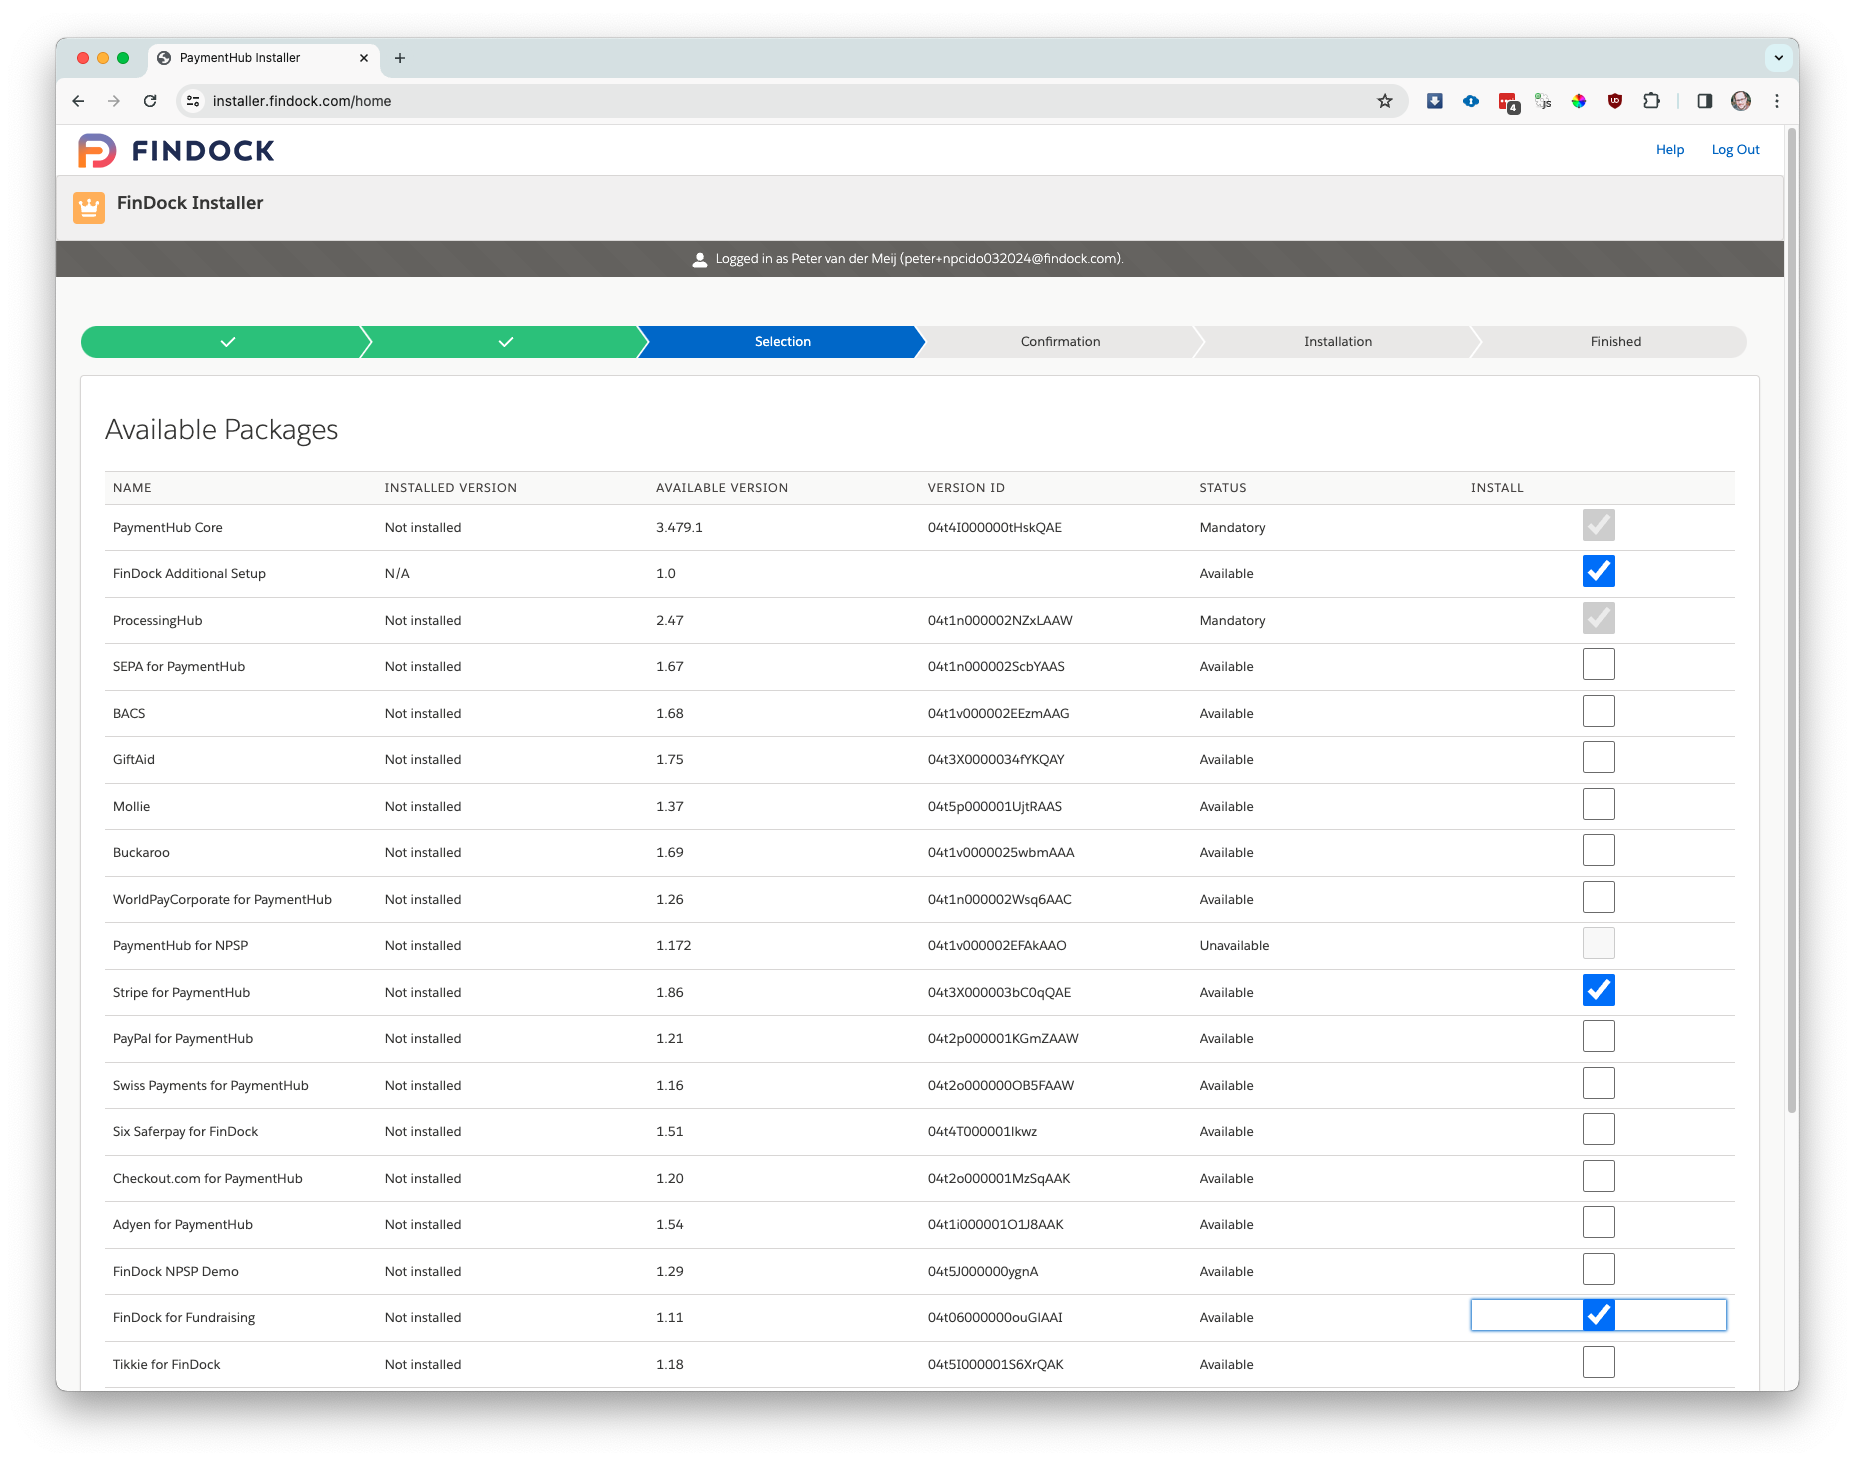
The FinDock installer with the relevant packages selected for installation.
Next, install the FinDock Demo App:
License management
FinDock comes with an automatic 30 day trial license once installed, for demo purposes FinDock is happy to extend that for you! Reach out to us or email salessupport@findock.com to request a license extension. Make sure to include the purpose of this installation (demo, training etc), the customer name (if applicable) and your Org Id.
Setup
It is recommended to perform the following steps logged in as the user who will be performing the demonstration. After all installations are complete, open the application switcher and search for “FinDock Fundraising Demo” This will open the FinDock Demo App.
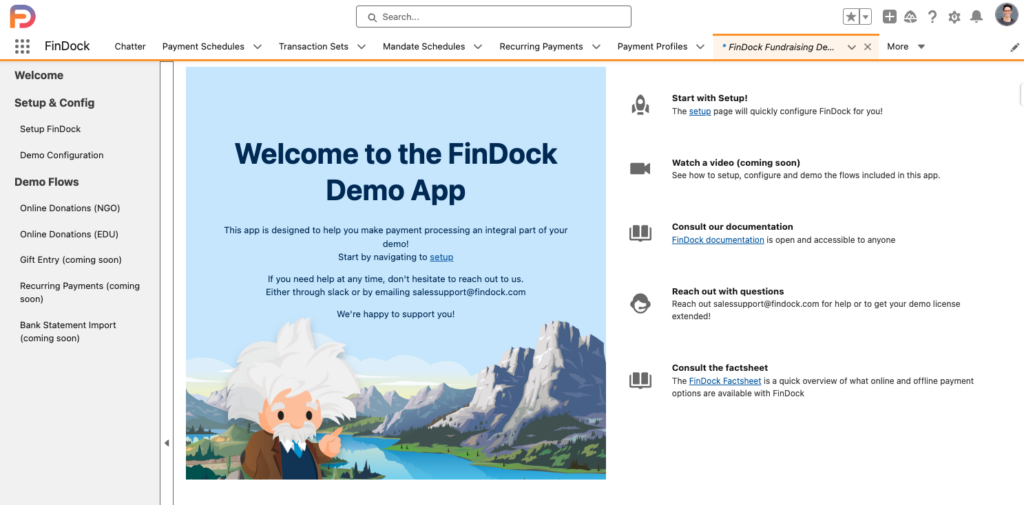
The FinDock Demo App welcome screen
Now start by navigating to “Setup FinDock” on the left hand side

The FinDock Demo App Setup Screen
This will setup FinDock with some default settings and demo-data for your org.
Assign Permissions will assign all FinDock permission sets to your current user, if you are going to use multiple user accounts during the demo, make sure to login as each of those users and perform this step.
Setup FinDock will activate FinDock and create some demo data including a campaign for you.
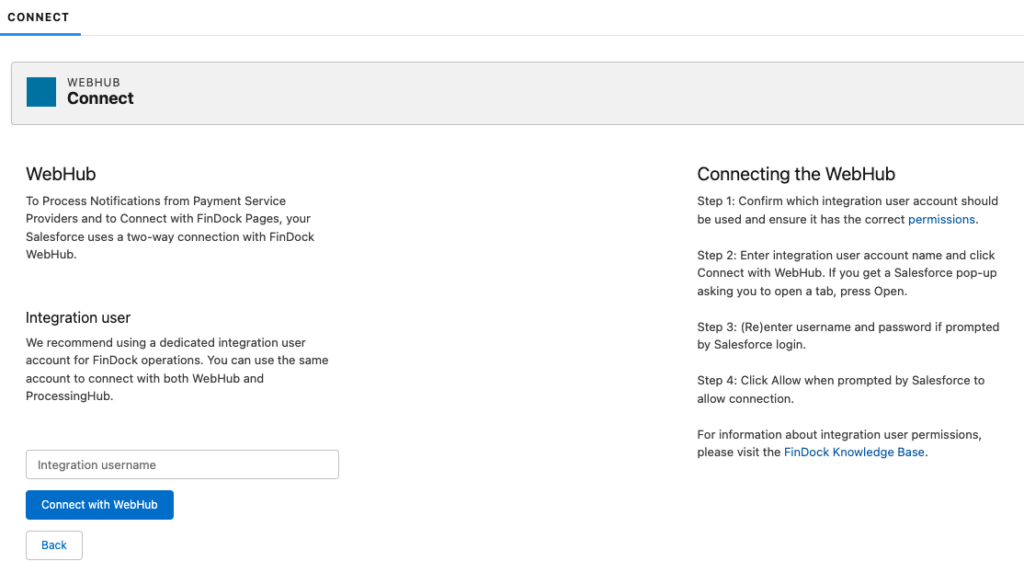
The Connect with WebHub screen
Connect WebHub will open the webhub connection screen in a new tab, copy your username and past it in the connection screen. Click connect and approve the OAUTH connection. Return to the setup tab, if the status of the Connect WebHub step hasn’t updated, refresh your screen.
Claim Giving Page Domain will assign a givingpage.org subdomain to your org based on the current URL of your Salesforce org. If your domain is “fi1710839163559.lightning.force.com” for IDO’s the domain name will be “fi1710839163559.givingpage.org” if you are connecting from a sandbox or a developer org, the domain name will be “fi1710839163559.test.givingpage.org”
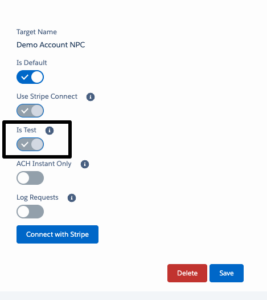
Connect with a new demo account at Stripe
Connect Stripe will help you setup a stripe connection. It will open up the Stripe connection screen in a new tab. Ensure the isTest toggle is enabled (on sandboxes this will be greyed out and always checked). And click the blue Connect with Stripe button. Important: do not change the name of the target! On the new page that opens, click the “Skip this form” button. This configures a Stripe demo account. which will allow you to perform all functions from FinDock, but will not allow you to login to stripe to see the transactions. If this is important to your demo story, you can instead choose to login with an existing Stripe account instead of using the skip button. You will be returned to the FinDock Stripe setup screen and the button should now indicate you are connected. Close this tab and return to the FinDock demo setup tab.
Deduplication rules 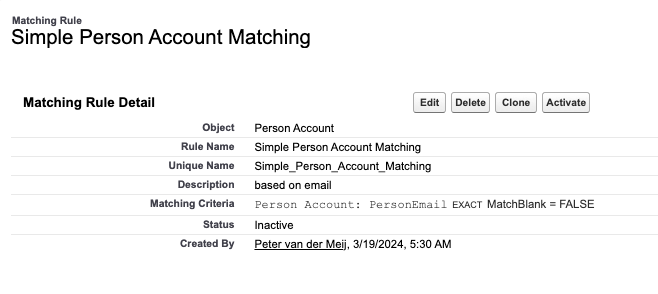 section is meant to make sure you have deduplication rules in place that will deduplicate a donor/alumni based on their email address. It is important to verify this so you will be able to show how online donations are linked to existing donors. The standard Person Account deduplication rule is usually not enough for a demo as it takes the billing address into consideration which often isn’t present in the online donation flow. Typically for demo purposes a matching rule based on email alone works perfectly
Demo Configuration
The next step is to configure some parameters for your demo such as campaign etc. On the configuration page there are some items at the top which will require configuration first.
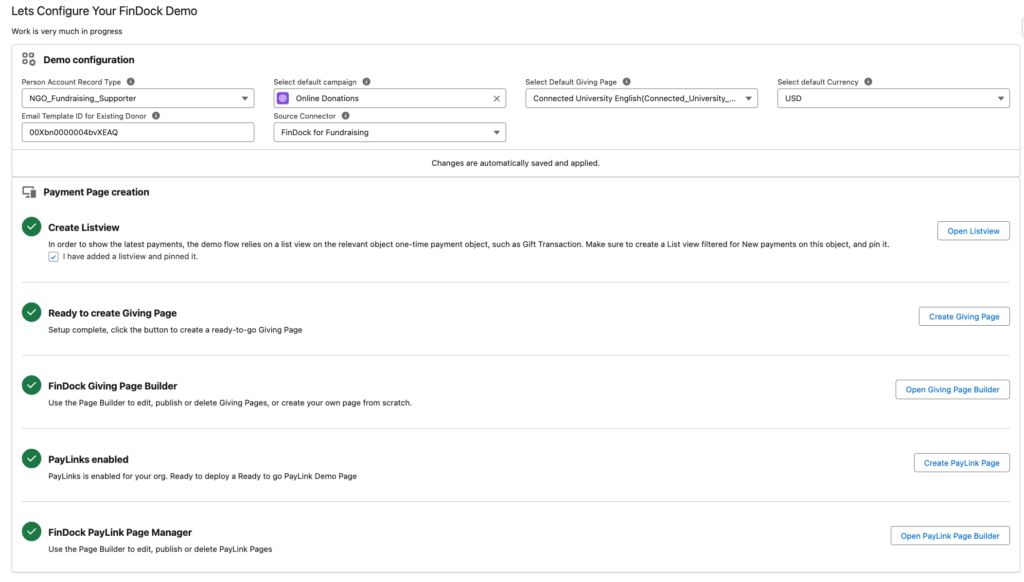
The FinDock Demo Configuration Screen allows you to parameterise your demo
Person Account Record Type select the right person account record type for the Giving Page to create. FinDock will need to know which record type to use when creating or deduplicating a donor record.
Default Campaign this is the campaign the donation will be linked to. When going through the setup, we automatically created “Online Donations” for you as a campaign, but feel free to use your own! Changing this does not affect already created pages!
Select default giving page, this is the page which will be opened when clicking the open page button the demo flow. Select default currency is the currency your giving pages are created with. Changing this does not affect already created pages! You can change the currency for existing pages in the builder. See the video here for more information: FinDock Demo App for Fundraising – Setup And Configuration – Changing your currency
Email Template Id for Existing Donor enables you to put in a lightning email template which can be used as the thank you email for the new one-time donation. For more information see the video here: FinDock Demo App for Fundraising – Setup And Configuration – Using custom email templates

Here the ID for this email template is “00Xbn0000004bvXEAQ”
Source Connector is the selection for the back end system. In orgs where you want the donations to be integrated into NPC Fundraising, select FinDock for Fundraising.
Create Listview is there to make sure you have a “new donations” listview in place so that when the listview opens, the system will have the latest donations on screen instead of all. Click the button to open the listview for your one-time donation object (Gift Transaction), create a new “New today” listview and Pin it as the default listview. See the video here for more information: [link to video time index]
Page management
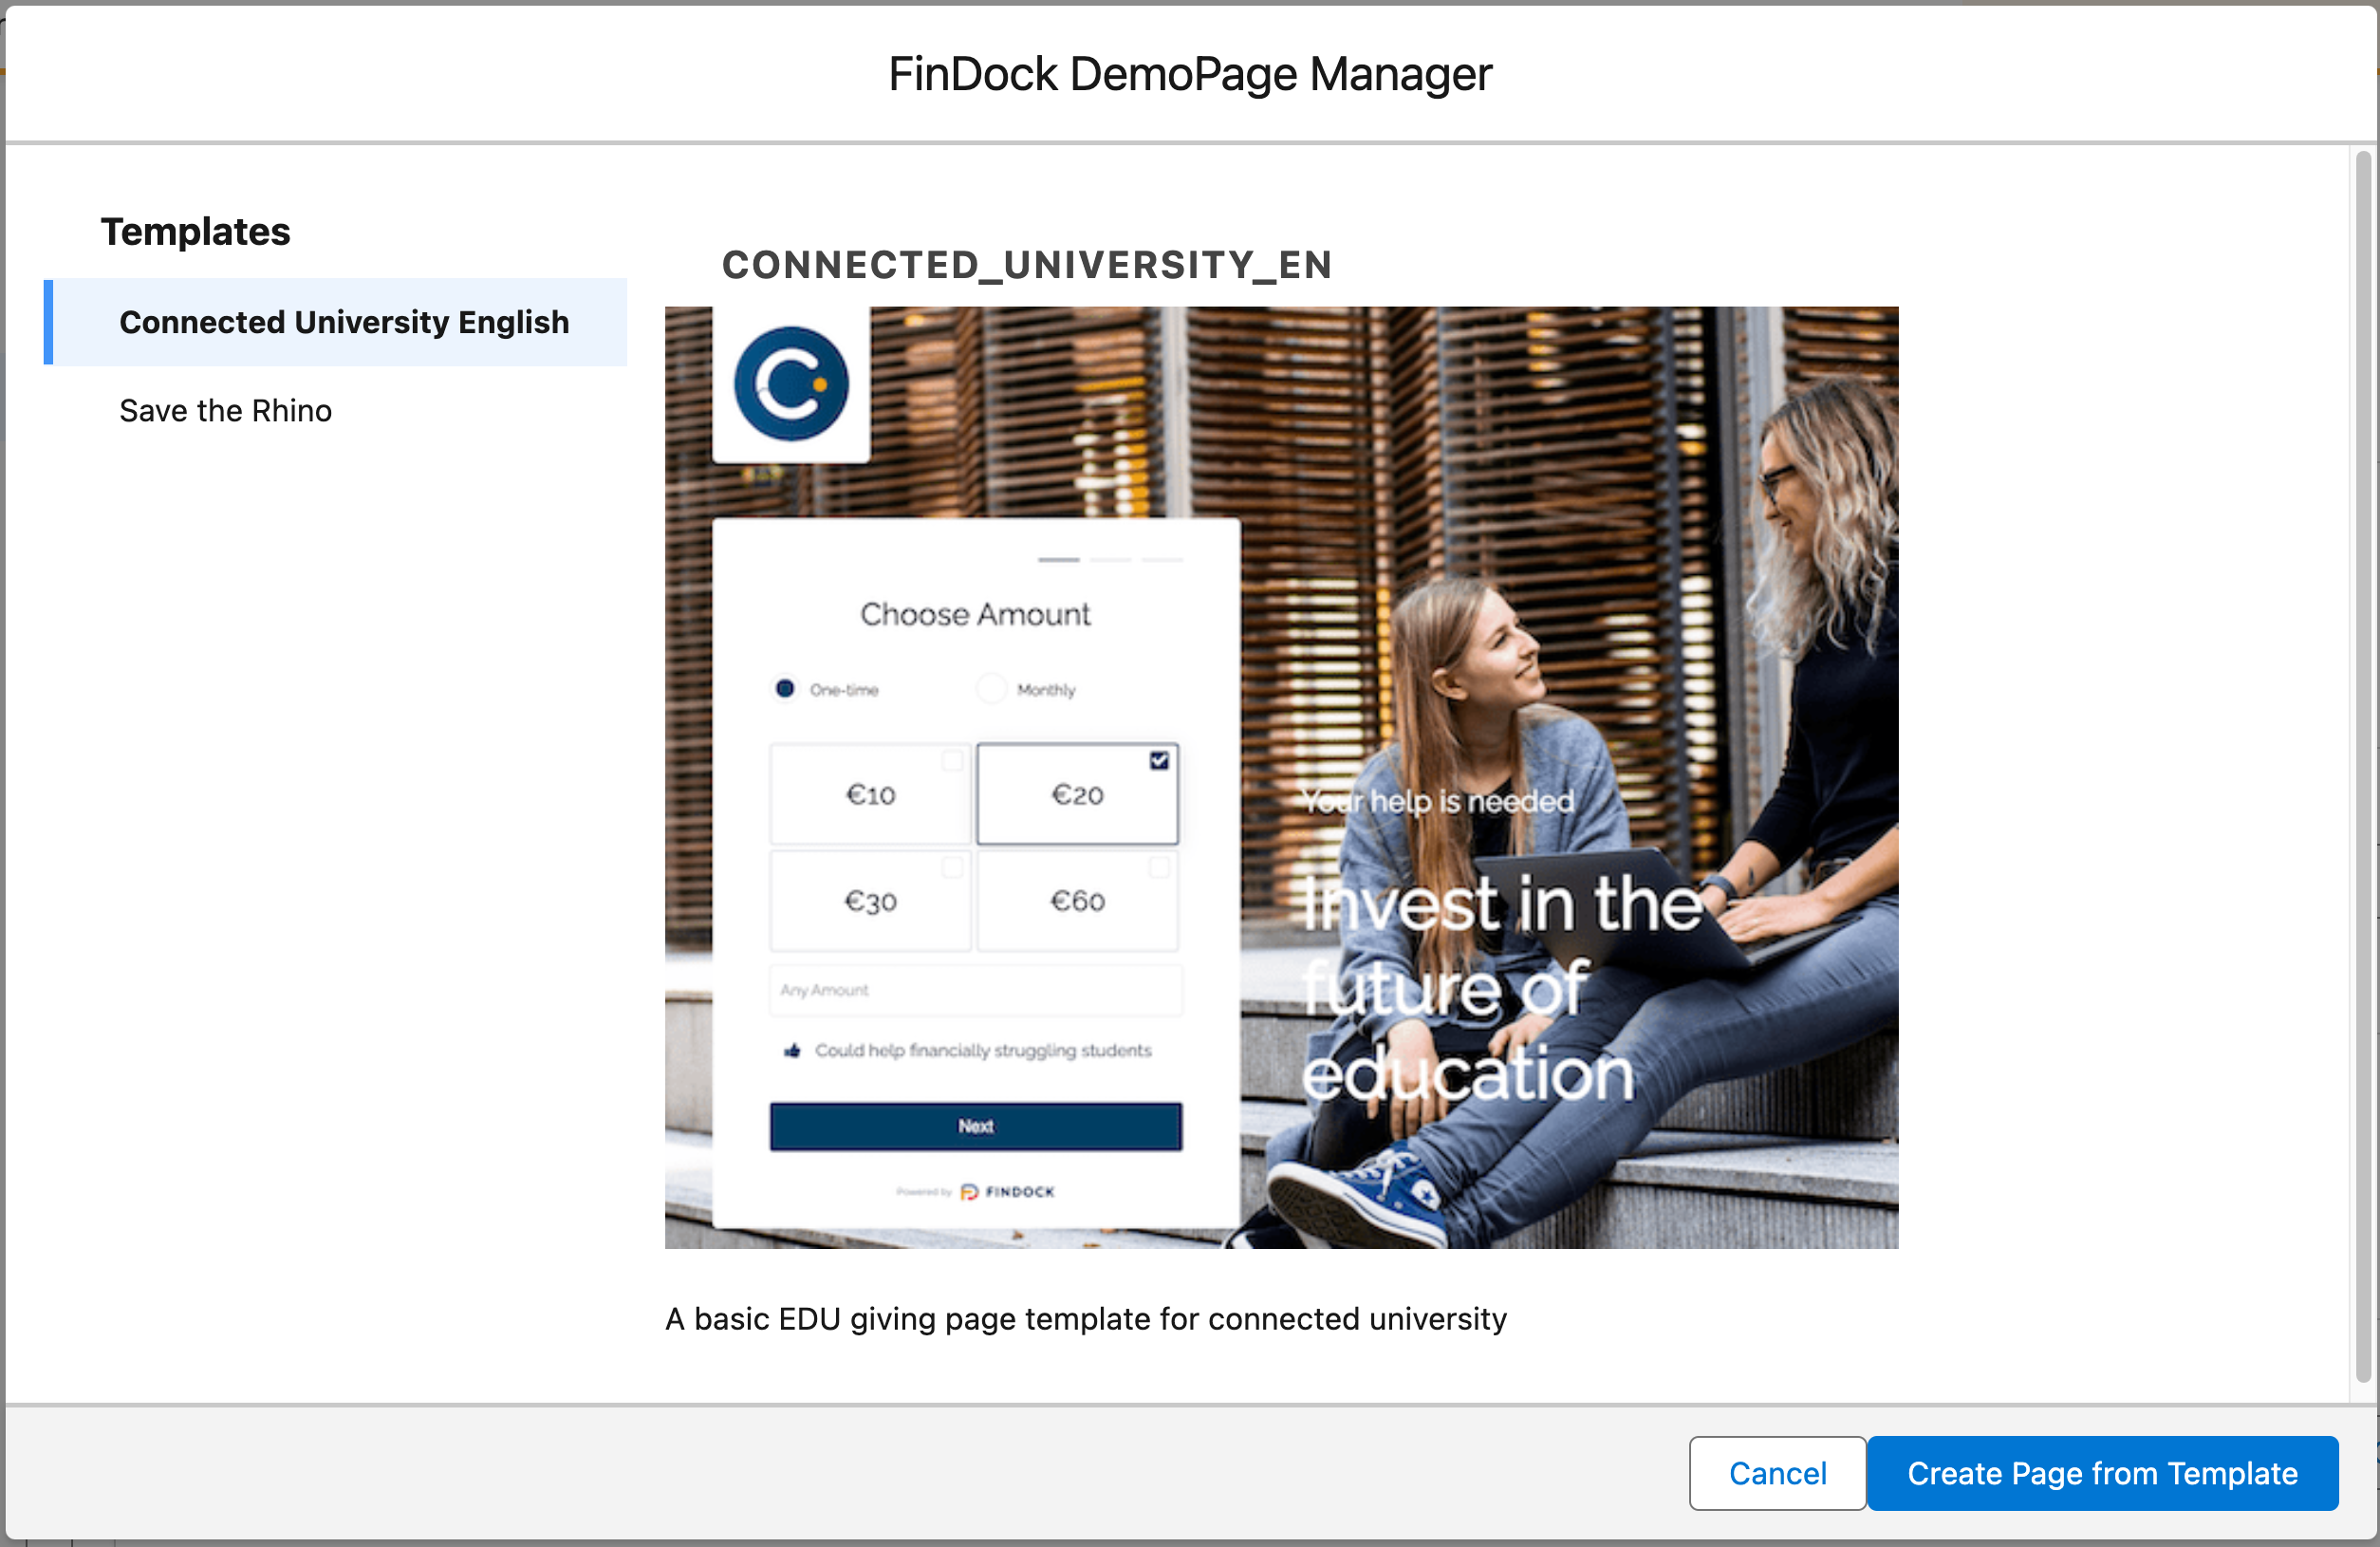
The FinDock Demo App comes with pre-build donation pages.
With all the configuration complete, you can now create your giving page. To make this easier, there are two pre-configured giving pages already in the system. By clicking the “Create Giving Page” button you can choose between the Education themed page or the “Save the Rhino” page. Of course, you can still create your own page from scratch in the Giving Page Builder if you’d prefer that or you can adjust one of the predefined pages with customer logo’s colours etc.
The Demo Flows
The FinDock demo app comes with build-in demo flows consisting of talk & click tracks ready for you to use as part of your existing story, or as a stand-alone demonstration. But you are by no means obligated to use the flow as written, feel free to create your own story or integrate the different demo elements into your own (existing) story.
Currently, the demo app has 2 stories included:
- Online donations for Fundraising organisations
- Online donations for Educational organisations
Need help?
We’re happy to help! Just reach out to us if you have any questions about the FinDock Demo App or how to demo FinDock. Fill out the form below and we’ll get in touch with you.